
Four-Part Mini-Series Introduction
This is the third post in a four-part series in the month of January on sharpening your knife. My four-part post is designed to be kind of like a mini-course on knife sharpening. There is a very special announcement that I will make at the end of the series so stay tuned to see what I have in store! You will not be disappointed.
This four-part mini-course is designed to take you through the process of establishing a burr. This course will get your blade razor sharp in no time. Of course, if you have been around MTKnives for any amount of time you will know that I am not satisfied with razor sharp. Again, you will have to stay tuned for my big announcement at the end of the month… Hint, hint.
If you are afraid you will forget to check back then make sure you sign up for my email list because I am going to be making the announcement via email also.
Lastly, here is a quick road map before we get started:
- Know These 4 Important Terms Before Sharpening Your Knife
- What is the Right Angle to Sharpen Your Knife?
- Top 5 Worst Mistakes Made When Sharpening Your Knife
- How to Establish a Burr on the Edge of Your Knife
Top 5 Worst Mistakes Made When Sharpening Your Knife
Common Mistakes
This post will cover the most common mistakes I have encountered by knife sharpeners. I have taught many people to sharpen their knife and these mistakes keep people from achieving beyond razor sharp knives more than anything I have encountered thus far.
Starting off with an extremely dull knife to learn with.
Removing enough metal from an extremely dull knife will take a very long time to make it even close to sharp. If you want to learn how to sharpen a knife beyond razor sharp then I recommend learning to sharpen using a knife that you think is relatively sharp. Or practice on a knife that is barely used. What is “relatively sharp” well that is how most knives come when you buy them, especially your $5 or $10 knives. They seem sharp to those who have not experienced what truly sharp is.
When you practice taking these blade edges beyond razor sharp you will be able to see much more quickly and easily the progress you are making. You will train your arms and hands to hold the correct angle on the blade. You will experience the thrill of sharpening a knife beyond razor sharp quickly which will energize you. You will be less frustrated and by starting with a sharp knife to learn on you will learn what the end goal of sharpening is first.
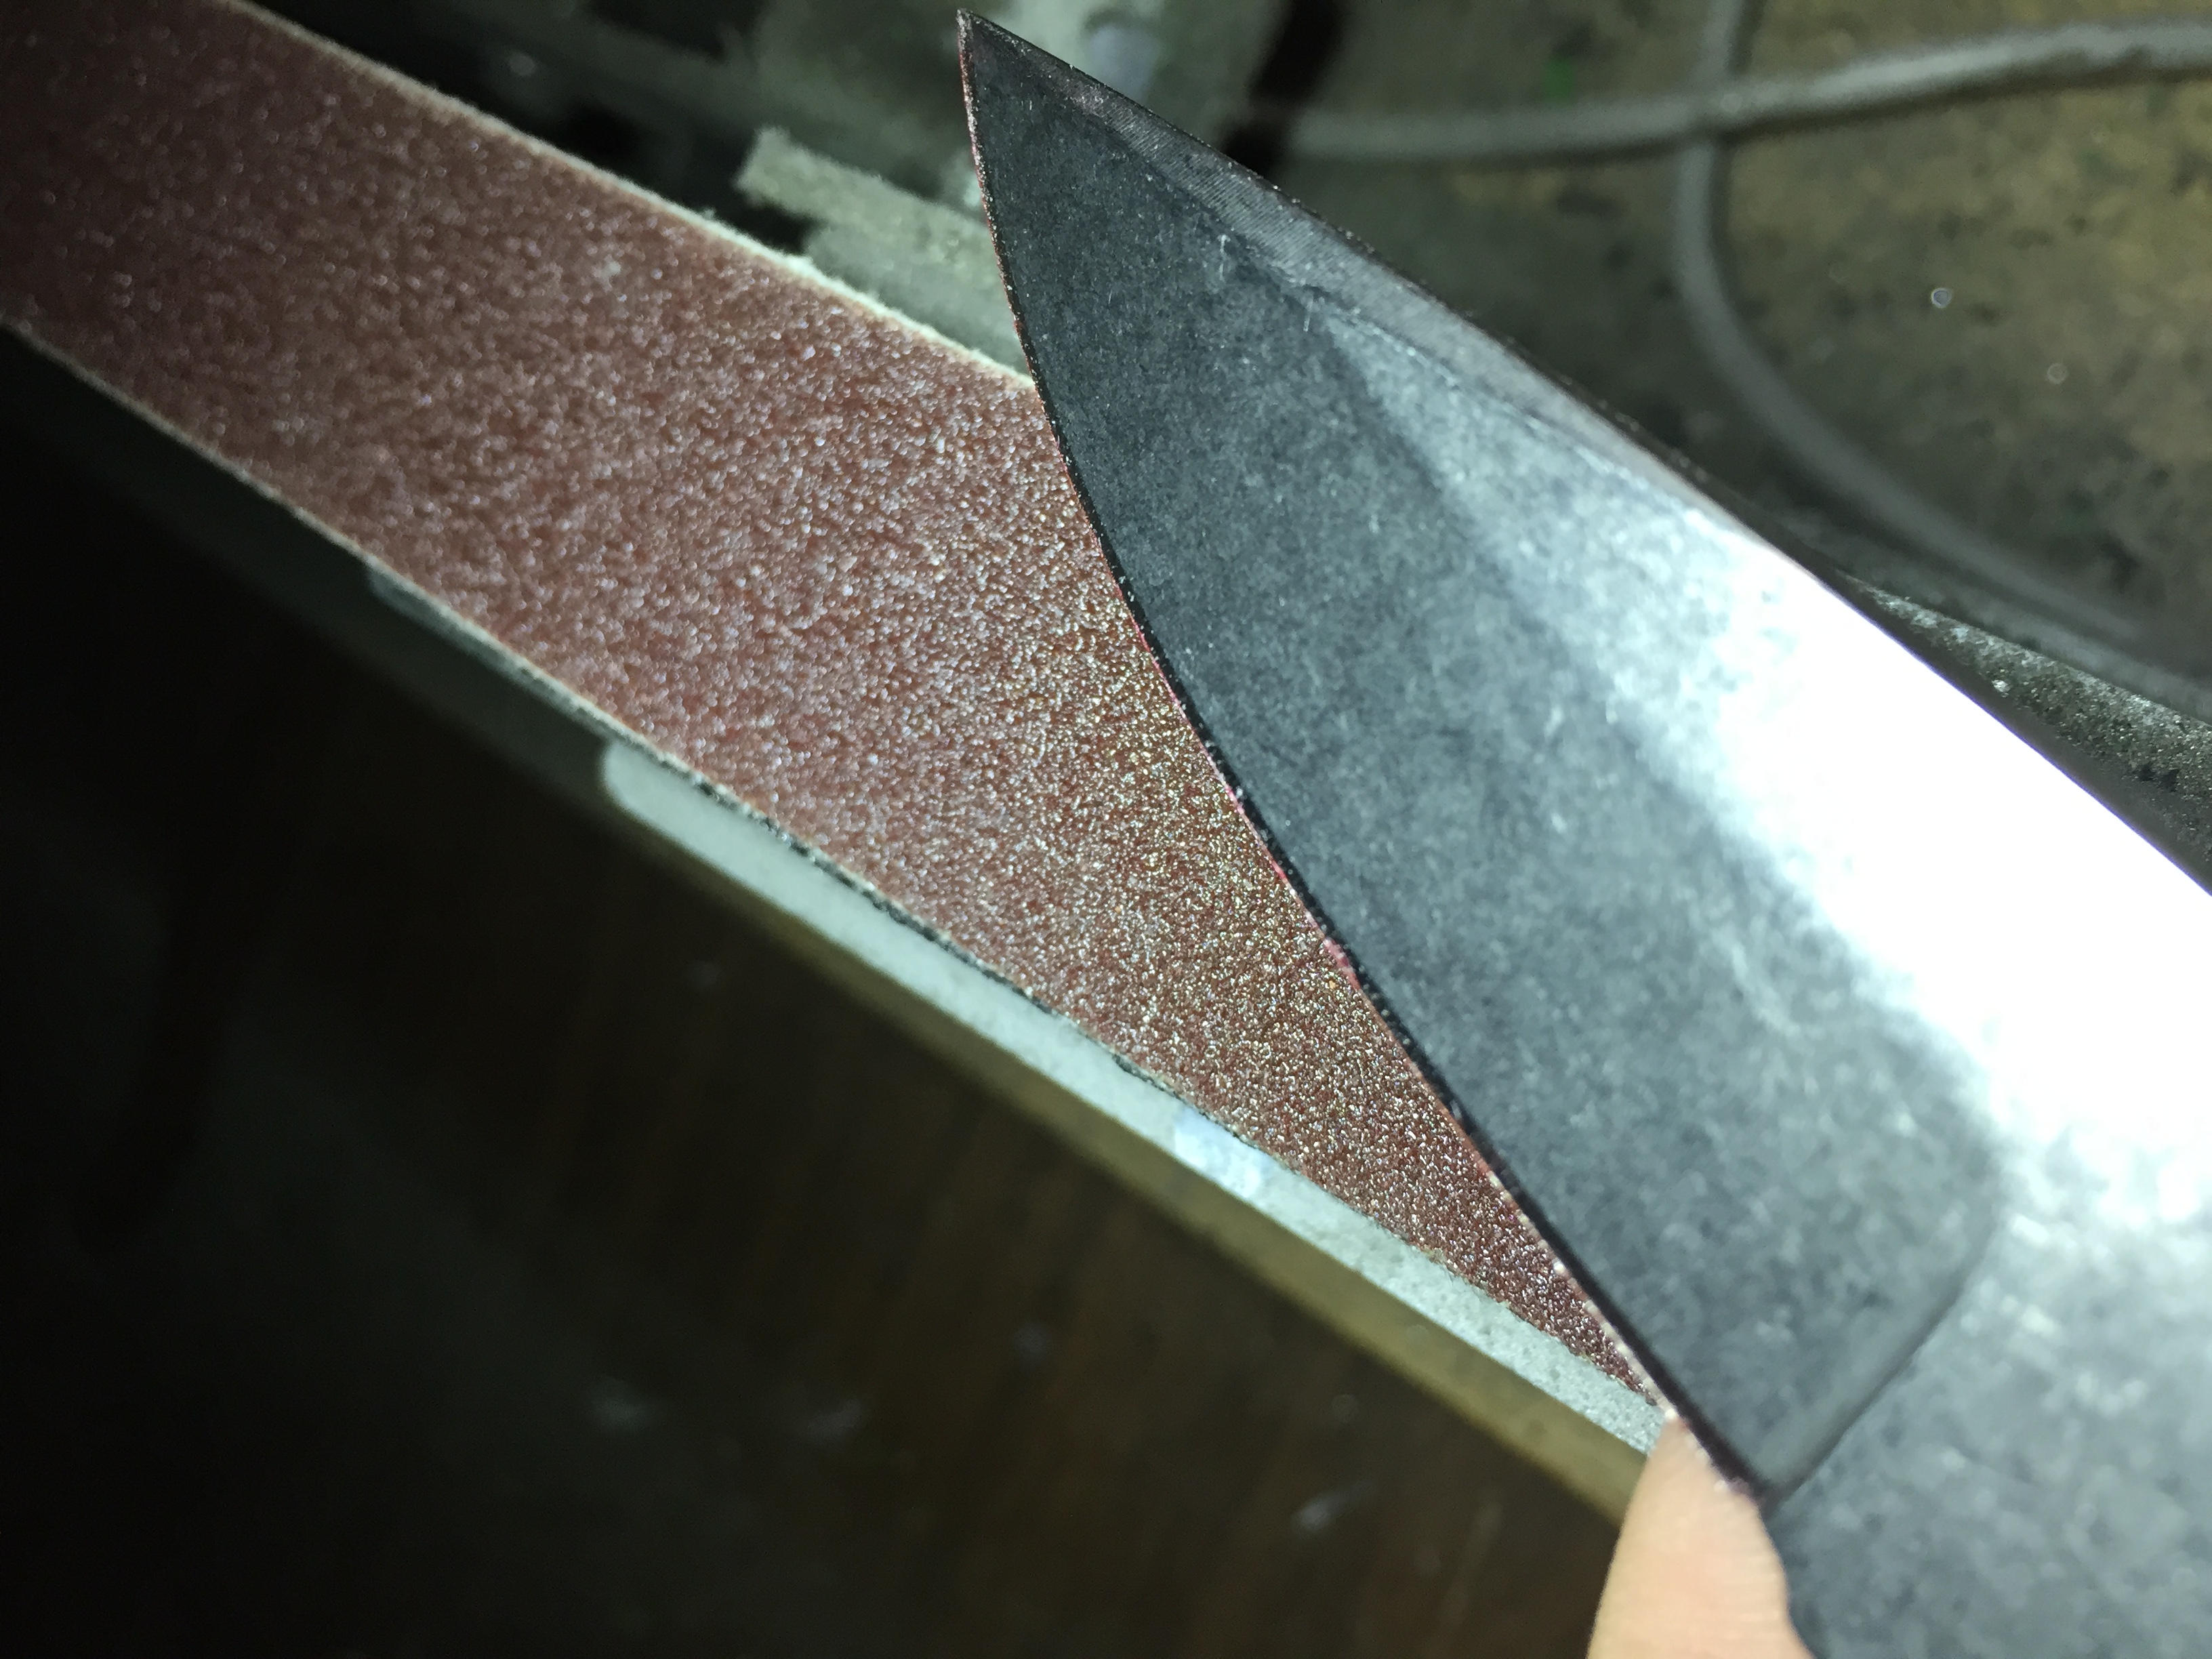
Not choosing the right grit to start with. Or misjudging when to switch stones.
When you start with a very dull knife you will need to remove a lot of metal to make the edge sharp again. Many people rightly start out with a very coarse grit stone or sandpaper. Most novices will move on from the coarse grit before establishing a burr. This will make your sharpening process much longer. Don’t change from a coarse grit until the burr is established.
If your knife is already sharp. Or you think it is already sharp you can start with a much finer grit stone or sandpaper and make your knife shaving sharp quickly. However, I find it best most of the time to at least give a couple passes on your course stone first. I have encountered many blade sharpening beginners who think their knife is sharp and start with a fine grit and then wonder why their edge doesn’t improve.
Choose your grit wisely and don’t move on until the burr is established!
Changing technique too often
Many knife sharpeners will switch techniques frequently while trying to sharpen their knife. Whether the knife is sharp or dull if you switch techniques in the sharpening process you can wipe out progress every time you switch your tactics. Choose a method and stick to it. If you are not seeing progress immediately, stick with it. Sharpening your knife takes time and you can’t rush removing metal from blades.
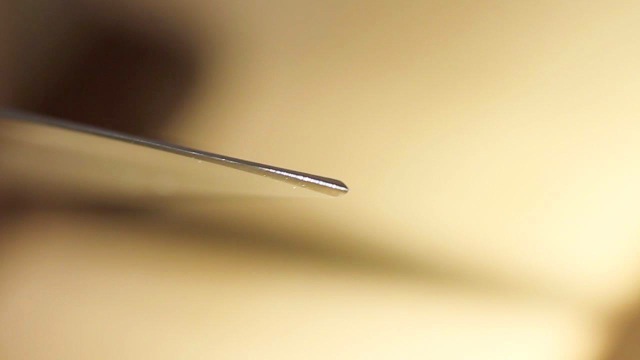
Not holding the blade at a low enough angle.
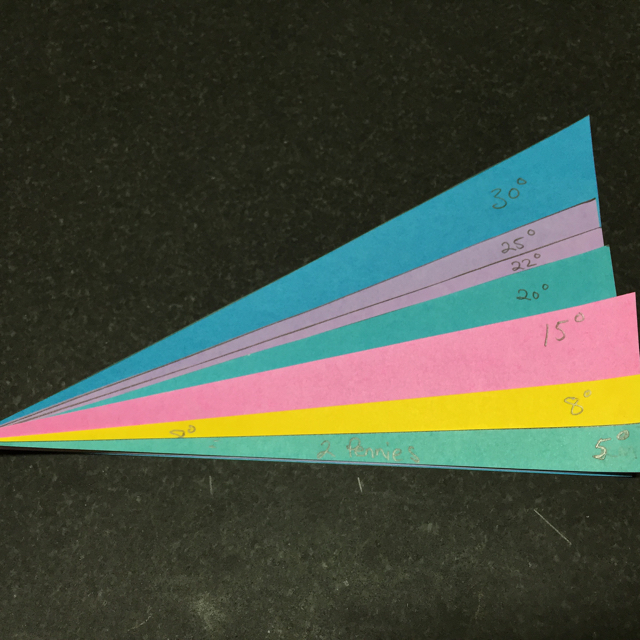
Many beginners will hold their knife at a higher than ideal angle. Don’t ask me why but most aspiring blade sharpeners misjudge what angle they are using. Here is my number one piece of advice for novice knife sharpeners. Hold a lower angle than you want to achieve.
If you hold to low of an angle you will be changing the primary edge making it wider which will slow down your sharpening. If you hold to high of an angle your primary edge will make it smaller creating a dull edge. You need to be goldilocks about this. Use the correct angle on the blade to sharpen your knife beyond razor sharp.
In a later post, I will discuss the two penny trick and the sharpie method to determine if you are holding the correct angle on the blade while sharpening.
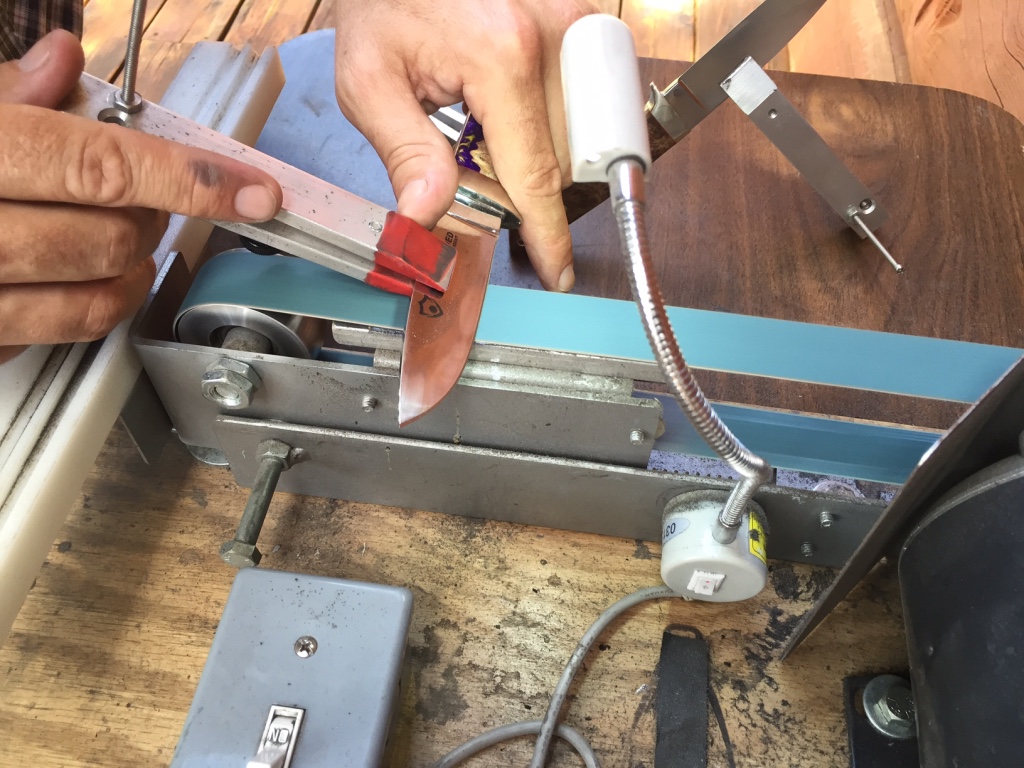
Buying magical gizmos that are guaranteed to give you success in mere seconds.
Buyer beware. I have used nearly every type of knife sharpening gadget on the market and they all require one thing that knife sharpening beginners don’t have. Practice. You must practice, to obtain results on any knife sharpening system out there. Don’t think that there is a silver bullet or a magic knife sharpening wand. There isn’t. You must do the hard work of learning a new skill to be successful.
I like to apply the 90-10 rule. Knife sharpening is 90 percent skill and 10 percent tools. You must put the time and effort into learning a new skill to acquire the new skill. Once you have the ability to sharpen a knife on one tool then you will likely be able to use any other tool to get similar results. So pick one system (I recommend Japanese water stones) and learn how to sharpen a knife properly using the tools you have.
Bottom line.
- Choose a relatively sharp knife to learn how to sharpen a blade.
- Use the same technique from start to finish.
- Choose the right grit to use and switch only at the right time.
- Remember that sharpening is 90 percent skill and 10 percent tool.
- Hold your blade at a lower angle than your are going for.
Avoid these mistakes as you learn to sharpen your blade beyond razor sharp and you will be a success!
Next up…
How to Establish a Burr on the Edge of Your Knife
In this post, we will discuss the process of establishing a burr on your knife. This is the most important and often missed step in sharpening your knife beyond razor sharp. If you don’t want to miss it be sure to sign up for my email list. I will be making a huge announcement in the last week of the month and you won’t want to miss that either!
Pick up Beyond Razor Sharp Digital Download Now.
Have you seen others making these mistakes, or made them yourself? If so leave your story in the comments below. What about other common mistakes you have seen?
Very well written article. Looking forward to reading the rest of them !
Thank You
Just want to say that I\’m enjoying your posts.
Thank You! 🙂
Thank You
Thanks. Great hints.
Howdy Patrick,
Great insight, as always.
That is all.
Hey there, just wanted to let you know these postings are of real good use to me. Also i wonder what this announcement wil be 🙂 Greetings from Amsterdam, Holland
Thank You 🙂
Patrick
Thanks for the input.
Mike